What Is the Best Wire Crimping Tool in 2026?
The best Wire Crimping Tool in 2026 is not simply the one with the most features. It is the one that makes consistent, secure crimps with the terminals and wire sizes you actually use. A tool that feels solid in your hand can still produce a weak connection if its die does not match the terminal. Small details matter.
Quality expert W. Edwards Deming wrote, “Quality comes not from inspection, but from improvement of the production process.” That principle applies to crimping: repeatable results depend on the right tool, correct settings, and careful technique—not appearance alone. In this guide, we compare ratcheting, self-adjusting, and interchangeable-die models, along with their practical strengths and limits. We also look at crimp consistency, grip comfort, adjustment range, build quality, and value.
A bright, even crimp is reassuring. It is not proof by itself. Check the terminal manufacturer’s specifications, match the connector to the wire, and inspect sample crimps before relying on a tool for repeated work. For example, a loose barrel may pull free, while an over-crimped terminal can damage its conductor. There is no universal winner. A compact tool may suit occasional repairs, while a bench setup may be better for frequent, controlled production. Our comparisons favor measurable fit and dependable results, though no test can represent every user or terminal. That limitation deserves a mention. The recommendations ahead explain which tools suit different tasks, budgets, and experience levels.
What a Wire Crimping Tool Does and How It Forms a Connection
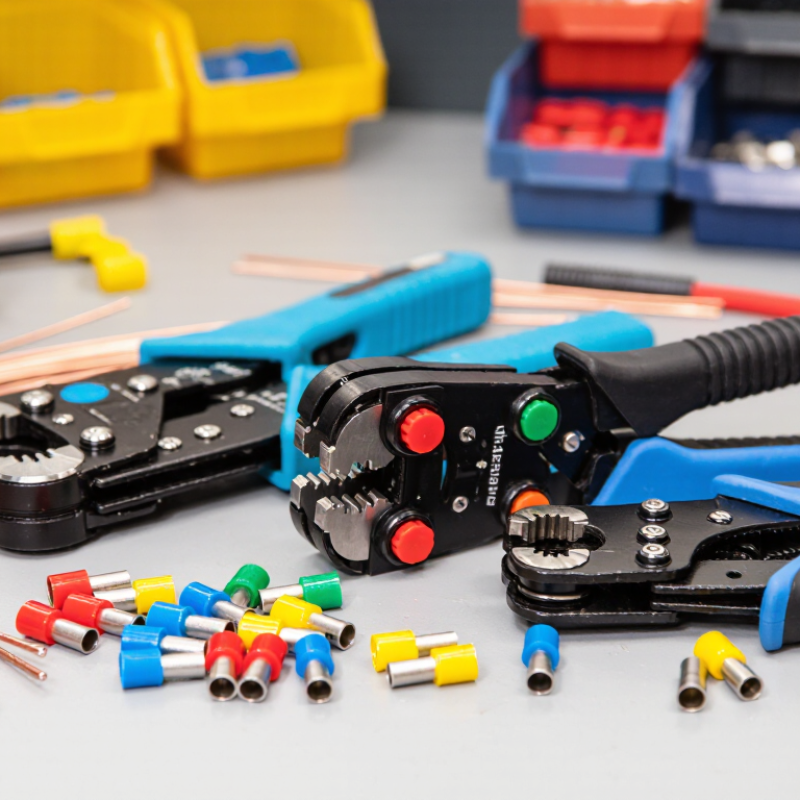
A wire crimping tool joins a wire to a metal terminal by compressing the terminal barrel around the stripped conductor. The matched die shapes the barrel and applies force at a controlled point. Done correctly, the strands stay captured, creating both electrical contact and mechanical retention. It is a cold-forming process; no solder is needed. Small details matter: the wire gauge, terminal size, and die profile must agree. A barrel that looks neat can still hide loose strands or a weak grip.
The U.S. Bureau of Labor Statistics projects electrician employment to grow 11% from 2023 to 2033, faster than the average for all occupations. That forecast is not specific to crimping, but it underscores the value of sound electrical workmanship. NASA-STD-8739.4A, a workmanship standard for cable and harness assemblies, treats crimp quality as something to inspect and verify—not merely judge by appearance. For critical work, follow the terminal maker’s specified tooling and wire range, then use the required inspection or pull-test method. A firm squeeze is not proof. Even experienced workers can miss a mismatched die, especially when several similar terminals sit on the bench. I would check the setup twice. It takes seconds.
Main Types of Wire Crimping Tools and Their Uses
What Is the Best Wire Crimping Tool in 2026?
Main Types of Wire Crimping Tools and Their Uses
The best wire crimping tool depends on the terminal, wire size, and working conditions. Ratcheting crimpers suit common insulated or non-insulated terminals. Their ratchet completes a full cycle before releasing, helping create consistent crimps. Non-ratcheting crimpers are lighter and useful for occasional repairs, but they rely more on steady hand pressure. For small ferrules, use a dedicated ferrule crimper; its shaped jaws compress the sleeve evenly around stranded wire. A generic terminal crimper may leave loose strands. Not ideal.
Hydraulic crimpers are designed for large cables and heavy-duty connectors. They provide greater force, but their size and matched dies make them less practical for small household wiring. Check the tool’s supported wire gauge and terminal type before buying. A die that looks close may still produce a weak or damaged connection. After crimping, inspect the barrel for cracks and gently test whether the wire moves. Follow the terminal maker’s instructions when available.
Tips: Strip only enough insulation to fill the barrel, and keep strands together. Match the die to the terminal, not just the wire. If a crimp looks uneven, stop and inspect it instead of assuming it is secure. Even careful work can go wrong; I would rather remake one crimp than trust a questionable connection.
Key Features to Compare When Choosing a Crimping Tool
A strong crimping tool is defined by the connection it makes, not by how heavy it feels. Check that its die profile matches the terminal and conductor specifications. IPC/WHMA-A-620, a widely used workmanship standard for cable and wire harness assemblies, emphasizes acceptable crimp results and inspection criteria. In practice, that means checking conductor compression, insulation support, and exposed strands—not just whether the jaws close. A ratcheting mechanism that completes its cycle can help prevent rushed, partial crimps. But it cannot correct a mismatched die.
Compare the tool’s wire-size range with the gauges you actually use. Look for clear markings, replaceable dies, and a calibration process you can verify. Handle the grip with gloves, if that reflects your work. A tool that slips on a small terminal or strains the wrist may slow a whole shift. The U.S. Bureau of Labor Statistics reported 2.6 million nonfatal workplace injury and illness cases in private industry in 2023, with an incidence rate of 2.4 cases per 100 full-time-equivalent workers. Those figures cover many hazards, not crimping alone, but they make comfort and repeatability worth considering.
Try sample crimps before committing. Inspect them under good light, then compare them with the terminal maker’s specifications. A smooth handle is nice. A consistent crimp matters more. I would not trust a tool based only on its advertised gauge range; those labels can hide practical limits. Even a well-built tool needs periodic inspection, and that part is easy to forget.
How to Match a Crimping Tool to Wires and Terminals
What Is the Best Wire Crimping Tool in 2026?
How to Match a Crimping Tool to Wires and Terminals
The best crimping tool is the one designed for your wire size and terminal type. Check the wire’s gauge or cross-sectional area, then compare it with the terminal’s stated range. A die that is too large may leave a loose connection. One that is too small can deform the terminal or damage the conductor. Close is not always close enough.
Match the die profile to the terminal: open-barrel, insulated, and uninsulated terminals often need different jaws. Insulated terminals may also require a die that supports the sleeve without splitting it. For repeat work, a ratcheting tool can help produce more consistent crimps. Still, a ratchet does not make a mismatched die correct. Check the tool and terminal instructions.
Look closely at the finished connection. The conductor should sit fully inside the barrel, with no stray strands trapped under insulation. A firm pull test on a sample can reveal a weak crimp, but it cannot replace the specified inspection method. I would also keep a scrap wire nearby for a trial crimp. It takes a minute. And yes, the first setup may need adjustment. If the terminal or wire specification is unclear, pause and verify it before crimping.
How to Evaluate the Best Wire Crimping Tool in 2026
What Is the Best Wire Crimping Tool in 2026?
A useful evaluation starts with the connection, not the tool’s appearance. Match the crimper’s die profile and wire range to the terminals you actually use. A tool for insulated connectors may not suit open-barrel terminals. Check the manufacturer’s specifications, then compare them with the terminal packaging. Fit matters.
Handle comfort is important during repeated work, but it cannot compensate for a poor crimp. Look for smooth movement, secure alignment, and a ratchet mechanism that completes its cycle consistently. The release should also work without a struggle. Small details matter. If possible, crimp sample wires and inspect each connection for even compression, damaged insulation, or loose strands. A gentle pull test can reveal a weak joint, though it does not replace the specified inspection method.
Consider adjustment and upkeep, too. Some tools require periodic calibration, especially in production settings; ask how this is checked and documented. Replaceable dies can be useful, but only when the correct profiles are available. Price alone is a poor guide. A heavier tool may feel more durable, yet become tiring over a long shift. That trade-off is easy to overlook. The best choice is the one that produces repeatable, verifiable crimps with your actual wires and terminals.