
Contract Manufacturing for Injection Molded Plastic Products in North America
(800) 824.0607

RFQ / CONTACT
Contract Manufacturing for Injection Molded Plastic Products in North America | (800) 824.0607

How to Choose High Quality Cabinet Hardware in 2026

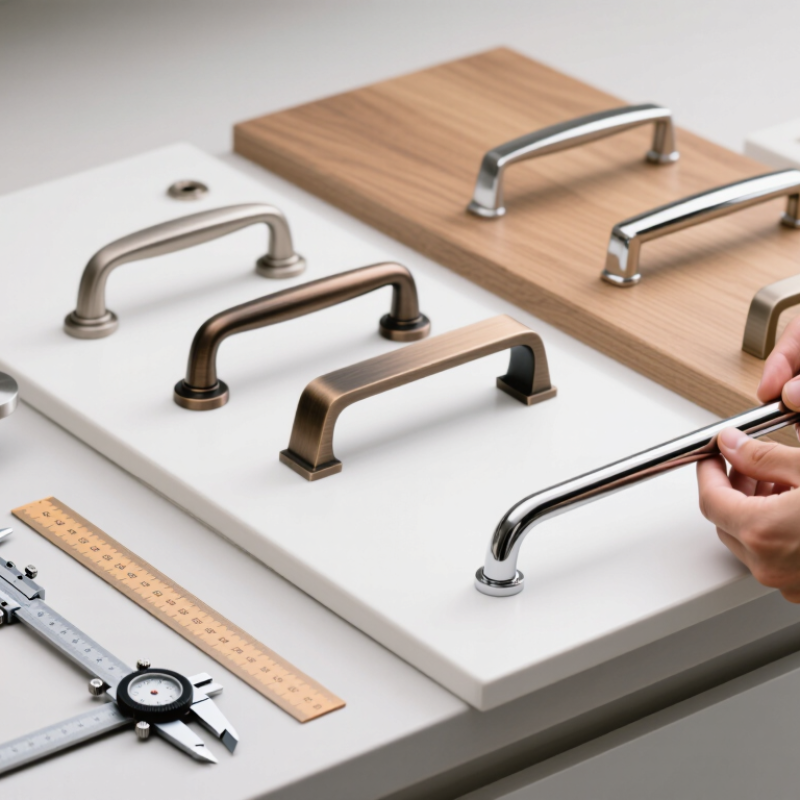
Cabinet hardware is easy to overlook until a drawer sticks or a pull feels awkward in your hand. In 2026, choosing High Quality Cabinet Hardware means weighing daily use alongside appearance. Good choices start with fit. Measure existing hole spacing, check door thickness, and compare each pull’s projection with nearby appliances and trim. Small mismatches can become irritating. Material and construction matter, but labels alone do not tell the whole story. Look for clear product specifications, consistent finish coverage, secure mounting, and care instructions suited to your kitchen or bathroom. Whenever possible, handle a sample; a solid metal knob and a lightweight plated one can feel very different. Feel matters. Yet even a durable piece may disappoint if its shape catches sleeves or its finish clashes with changing light.

An informed selection also considers dampness, cleaning routines, warranty terms, replacement availability, and installation needs. These details are less exciting than a new finish. They often matter longer. Check product claims against published specifications and, where possible, independent testing rather than trend photos alone. Not every home needs the most expensive option. A modest pull can serve well when construction, fit, and maintenance suit real use. This guide will help you compare styles, materials, finishes, sizing, and value through practical questions. Expect useful criteria, not a universal winner. Even careful advice has limits: finishes age differently, and preferences change. That is worth remembering.
How to Choose High Quality Cabinet Hardware in 2026

Define Cabinet Use and Compare ANSI/BHMA A156.9’s Three Performance Grades

Define cabinet use before comparing finishes. A pantry drawer opened dozens of times daily needs different hardware from a rarely used display cabinet. ANSI/BHMA A156.9 assigns cabinet hardware performance grades through standardized tests. Grade 1 suits heavy-duty use, Grade 2 moderate use, and Grade 3 light-duty use. Match the grade to traffic, load, and expected service—not appearance alone. Small details matter. A wide, fully loaded drawer puts different demands on slides than a shallow utensil drawer. Check that the grade applies to the specific hardware type; test criteria can differ across components.

Industry data helps explain why this choice matters. Houzz’s 2024 U.S. Kitchen Trends Study reports that 76% of renovating homeowners upgraded at least some kitchen cabinetry. That figure does not measure hardware failure, but it shows how often cabinets are part of a renovation. For busy kitchens, compare the product’s stated A156.9 grade and test documentation, then check installation requirements and load ratings. A higher grade can be sensible for heavily used doors or drawers, though it may be unnecessary for a guest-room cabinet. Standards guide comparison; they cannot predict every household’s habits. A little uncertainty remains.

How to Choose High-Quality Cabinet Hardware in 2026

Define how the cabinets will be used, then compare hardware against the appropriate ANSI/BHMA A156.9 performance grade.

Grade 1 represents the highest performance level, followed by Grade 2 and Grade 3. The chart shows grade order only—not a numeric test score. A156.9 requirements vary by hardware category, so check the applicable tests and select hardware for the cabinet’s expected frequency and severity of use.

Measure Pulls Center-to-Center and Check 32 mm System Compatibility

Choosing cabinet pulls starts with a precise measurement, not a guess based on appearance. Center-to-center distance is measured from the middle of one screw hole to the middle of the other. It is not the pull’s total length. Small errors matter. Use a ruler with clear millimeter markings, or a caliper for greater precision. If the cabinet already has holes, measure those centers before ordering replacements.

The 32 mm system refers to a common cabinet-making layout, where hole positions follow 32 mm increments. This can help when planning new doors or drawer fronts, but it does not guarantee that every pull will fit. Check the hardware’s stated center-to-center size against the actual hole spacing. For new installations, a drilling template helps keep holes level and consistent across multiple drawers. Check the template itself, too; a slight shift can become obvious in a row of cabinets.

If existing holes do not match, avoid forcing screws at an angle. That can stress the finish and leave the pull sitting crooked. A backplate may cover old holes, but measure its dimensions and confirm that its new mounting points suit the cabinet. I would recheck measurements before drilling, even after marking them once. It feels repetitive, but the second check is often the useful one.

How to Choose High Quality Cabinet Hardware in 2026 — Measure Pulls Center-to-Center and Check 32 mm System Compatibility

Selection Check What to Measure or Verify Practical Reference Why It Matters
Pull center-to-center (C-C) Measure the distance from the center of one mounting hole to the center of the other. For existing cabinets, measure the current hole centers rather than the pull’s overall length. Common sizes include 64, 96, 128, 160, and 192 mm. These are multiples of 32 mm. The replacement must match the existing hole spacing to reuse the holes without drilling or filling.
32 mm system compatibility Check whether the cabinet uses a 32 mm hole-spacing layout and confirm the pull’s C-C dimension is compatible with the intended mounting points. For example, 96 mm = 3 × 32 mm; 128 mm = 4 × 32 mm; 160 mm = 5 × 32 mm. Matching the system can make layout and installation more consistent, but the actual cabinet-hole spacing still needs to be measured.
Metric and inch conversion Compare dimensions in the same unit before ordering. Convert inches to millimeters by multiplying by 25.4. 3 in = 76.2 mm; 4 in = 101.6 mm. Neither is an exact match for 64 mm or 96 mm. Similar-looking nominal sizes may not align with existing holes. Do not rely on rounded labels alone.
Overall pull length Measure the pull from end to end separately from its C-C dimension. A pull with 128 mm C-C spacing will generally be longer than 128 mm overall; the difference depends on its design. Overall length affects appearance and clearance, but it does not determine whether the mounting holes fit.
Knob dimensions Check the knob’s base diameter, projection from the cabinet face, and required screw length. Knobs commonly use a single mounting hole; confirm the existing hole diameter and mounting arrangement. These dimensions help avoid interference with nearby doors, trim, or adjacent hardware.
Door and drawer clearance Check the pull’s projection and position against neighboring doors, drawer fronts, walls, and appliances. Open adjacent doors and drawers fully when checking a proposed location or pull shape. A pull can match the hole spacing yet still collide with nearby surfaces during normal use.
Material and construction Review the stated material, finish, mounting method, and whether the hardware is intended for the expected use. Compare product specifications and finish-care instructions; appearance alone does not establish material or durability. Clear specifications help assess suitability and maintenance needs, especially in frequently used or humid areas.
Screw fit Confirm the supplied screw type and length suit the cabinet-front thickness and mounting hardware. Measure the cabinet front and check the manufacturer’s fitting instructions before installation. A screw that is too short may not secure the pull; one that is too long may protrude or damage the cabinet.
Final measurement check Measure each existing hole pattern and compare it with the listed C-C dimension before purchasing. Record the measurement in millimeters or inches, including any fraction, and verify it twice. Accurate measurement reduces the risk of ordering hardware that requires new holes or cabinet repairs.

Measurement note: Center-to-center is the distance between mounting-hole centers, not the distance between the pull’s outer ends. A 32 mm increment is a layout reference; always verify the actual cabinet-hole spacing.

Match Drawer-Slide Load Ratings in Pounds to the Loaded Drawer Weight

A drawer-slide rating is a working limit, not a guess based on drawer size. Weigh the drawer box, front, and contents together; a full stack of ceramic plates can add weight quickly. Common residential ratings include 75, 100, and 150 pounds per pair, but rating methods can differ. Check the technical sheet for the exact model and whether its stated capacity applies to a pair or an individual slide. ANSI/BHMA A156.9-2020 sets performance and test requirements for cabinet hardware, including drawer slides; a rating tied to a recognized test method is more useful than a number without context.

Tips: Load the drawer as it will be used, then weigh it. Choose the next suitable rating above that total, and allow extra capacity for heavy or frequently opened drawers. A 90-pound loaded drawer, for example, should not be paired with a 75-pound slide set. Also check installation details: side clearance, drawer width, and mounting position can affect performance. A high rating cannot fix poor alignment.

One detail is easy to overlook. Slide capacity does not automatically mean the cabinet itself can safely support the same load. Inspect the cabinet sides and fasteners, especially with wide drawers. A small test load helps, though it is not a substitute for the slide maker’s documented rating.

Compare Published Corrosion-Test Hours Under ASTM B117

How to Choose High Quality Cabinet Hardware in 2026

When comparing cabinet pulls, hinges, and knobs, look for published corrosion-test hours under ASTM B117. The standard describes a controlled salt-fog procedure; it does not set one universal pass score for every finish. ASTM B117-19 also cautions that salt-fog results do not always predict natural exposure. That matters. A 500-hour claim is not a promise of five years, or even five years indoors. Check what was tested: the exact finish, base metal, sample preparation, and evaluation criteria. A test on a flat coated panel may not represent a sharp-edged handle, where coating can be thinner.

Q-Lab’s technical guidance on salt-spray testing likewise warns against treating accelerated exposure as a direct service-life forecast without relevant field correlation. Compare hours only when test conditions and pass criteria match. Ask whether the report records red rust, blistering, or another failure point, and whether edges or cut areas were included. Better documentation names the lab, test date, and standard revision. Vague claims deserve a question, not an assumption. I still find hour counts useful—just not sufficient.

Tips: Request the full test report, not only a product-page number. Match the finish and substrate to your project, especially near sinks or coastal windows. Look for ASTM B117 and the stated acceptance criteria. Sources: ASTM B117-19; Q-Lab, “Salt Spray Testing” technical guidance.

Verify Cycle-Test Results, Fastener Fit, and Installation Clearances

In 2026, do not judge cabinet hardware by finish alone. Ask for cycle-test results tied to the exact model, not a general product family. ANSI/BHMA A156.9 covers cabinet hardware and sets performance tests for relevant hardware types. Request the test date, cycle count, and pass criteria; a “tested” label without those details tells you little. Check that the report matches the hinge or slide you are buying. Small distinction, big difference.

Fasteners need a physical check. Measure the cabinet front, then compare its thickness with the supplied screw length and the hardware’s mounting depth. The screw must engage securely without piercing the visible face. Match thread type and diameter, too. I would not assume spare screws from another project fit; they often do not. Test one assembly before drilling every hole.

Clearance is easy to overlook. Mock up the handle with cardboard or a sample, then open nearby doors and drawers fully. Check for collisions with appliances, trim, and adjacent pulls. NKBA’s Kitchen Planning Guidelines recommend 42-inch work aisles for one cook and 48 inches for multiple cooks. Those figures describe aisle planning, not handle projection, so measure the installed hardware separately. A tidy drawing can still miss a knuckle-catching corner.