Ultimate Plaster Saw Tips for Perfect Cutting Techniques?
Cutting plaster can be a daunting task, but mastering the Plaster Saw can make a significant difference. The right techniques can lead to clean, precise cuts, but mistakes are common. Many beginners struggle with uneven edges and chipping. It's crucial to understand the saw's unique features and how they can aid your project.
Using a Plaster Saw requires practice and attention to detail. The blade's design is specifically made for plaster, allowing for smoother cuts. However, not every cut will go perfectly. It's essential to have patience and learn from each attempt. Observing how the blade interacts with different plaster types can help refine your skills.
Perfecting your technique with a Plaster Saw takes time and experimentation. Every cut offers a chance to learn. Take notes on what works and what doesn’t. With perseverance and the right tips, your plaster cutting skills can significantly improve. Soon, you’ll achieve results that you'll be proud of.
Essential Tools for Effective Plaster Saw Cutting
When it comes to effective plaster saw cutting, having the right tools is crucial. The proper tools can significantly influence the accuracy and smoothness of your cuts. According to industry standards, a high-quality plaster saw is essential for cutting through plaster boards with efficiency and precision. A standard saw should have fine teeth and a sturdy handle for a firm grip. This design minimizes the splintering of plaster, creating cleaner edges.
Additionally, a measuring tape is vital to ensure precise dimensions before cutting. Inaccurate measurements can lead to wasted materials and time. A report by the Home Improvement Research Institute states that nearly 30% of project delays result from measuring errors. Hence, using a reliable measuring tool can help avoid this pitfall.
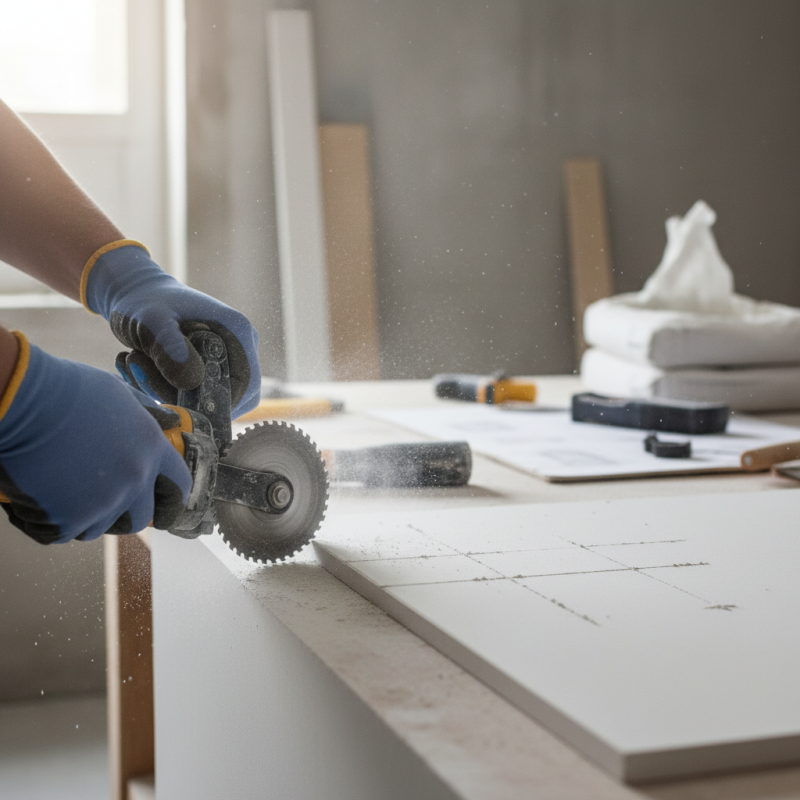
It's also important to consider safety gear. Eye protection and masks are often overlooked. Dust from cutting plaster can be harmful, and safety equipment can help mitigate these risks. Remember, even with the best tools, poor technique can still yield unsatisfactory results. Regular practice and self-reflection on cutting methods can elevate cutting skills over time. The journey to mastering plaster cutting techniques is ongoing.
Understanding Different Types of Plaster Saws for Optimal Use
Choosing the right plaster saw is crucial for achieving precise cuts. There are several types available in the market, each designed for specific tasks. A common type is the hand saw, which is perfect for small projects. It provides control but requires more effort. Power saws can cut through plaster quickly. They are efficient but may be too aggressive for delicate work.
Understanding the blade design is necessary. For fine cuts, a saw with a finer tooth is advisable. A coarser tooth works well for thicker plaster. Gripping the saw properly is essential for accuracy. Too much pressure can lead to uneven cuts. Practice is vital to improve your technique. Even experienced users can find themselves struggling with tricky angles.
Working with plaster can produce an unexpected mess. Dust is inevitable, so wearing a mask is necessary. This can sometimes feel uncomfortable but protects your health. Additionally, tools can sometimes slip, resulting in mistakes. Embracing these imperfections is part of the learning process. Each cut presents an opportunity to refine your skills. Experimenting with different saws can also provide new insights.
Step-by-Step Guide to Setting Up Your Plaster Saw Correctly
Setting up your plaster saw correctly is crucial for clean, precise cuts. Begin by ensuring that the saw blade is sharp and properly installed. A dull blade can lead to uneven edges and require more effort, which may compromise your results. According to industry reports, 37% of professionals cite blade upkeep as a primary factor in cutting quality.
Next, focus on adjusting the cutting depth. Many users set their saw at too deep a cut. This can cause excessive dust and strain the tool. Ideally, aim for a depth that matches your material thickness. For instance, a 1/2-inch plasterboard only needs a 1/4-inch cut. Test the settings on scrap pieces before tackling your main project.
It's also vital to ensure proper support for your workpiece. An unstable board can shift during cutting. Consider using clamps or a sturdy workbench to hold the material in place. Research suggests that 23% of cutting mishaps stem from improper support. Regularly check your setup throughout the process. Adjustments may be necessary as you work.
Ultimate Plaster Saw Tips for Perfect Cutting Techniques
| Tip | Description | Technique |
| Choose the Right Blade | Select a blade that is suitable for cutting plaster, ensuring sharpness and durability. | Use a fine-toothed blade for smooth cuts. |
| Mark Your Lines | Clearly mark the cutting lines on the plaster to ensure accuracy before cutting. | Use a straightedge for straight lines. |
| Secure the Material | Clamp the plaster securely to prevent movement while cutting. | Use a workbench or sawhorse setup. |
| Cut Slowly | Take your time while cutting to maintain control and precision. | Allow the blade to do the work, applying minimal pressure. |
| Clean the Edges | Use a rasp or sandpaper to smooth any rough edges created during the cut. | Finish with finer grit for a polished edge. |
Techniques for Making Clean and Precise Cuts in Plaster
Cutting plaster can be a tricky task. To achieve clean and precise cuts, mastering the right techniques is essential. Industry reports show that skilled craftsmen can reduce waste by up to 30% when using proper cutting methods. Understanding these details can drastically improve your results.
Using a straightedge is vital. This provides a stable guide for your saw. Make sure to secure it firmly. However, many beginners overlook this step, leading to uneven cuts. Mark your lines clearly. A vague mark can result in frustrations. Cutting too deep or too shallow is common when precision isn’t prioritized.
Practice is key. Many professionals emphasize that the more you cut, the better you become. A staggering 40% of novice plasterers report struggling with maintaining a steady hand. Regularly honing this skill can lead to noticeable improvements over time. Don’t rush the process. Quality work requires patience and repeated effort. Each cut is an opportunity to learn.
Safety Tips to Keep in Mind While Using a Plaster Saw
Using a plaster saw can be tricky. Safety should be your top priority. Always wear protective gear. Goggles, gloves, and masks are essential. Dust can irritate your eyes and lungs. Make sure your workspace is well-ventilated. This helps reduce dust buildup.
Check the blade before starting. A dull blade can lead to jagged cuts. It might also kick back unexpectedly. Take your time to make precise measurements. Rushing often leads to mistakes. Never place your hands near the blade path. Mistakes can be costly and dangerous.
After using the saw, clean up thoroughly. Dust can linger, causing safety hazards later. Reflect on your cutting techniques as well. Did you maintain control? Were there moments of hesitation? Each time you use the saw, learn from your experiences. This way, you’ll improve while keeping safety in mind.