
Contract Manufacturing for Injection Molded Plastic Products in North America
(800) 824.0607
Swiss Turning Services For Titanium Bone Screws demand more than fast production and attractive surface finishes. These implants require controlled cutting, stable geometry, and disciplined inspection from raw bar stock to packaged component. Titanium can work-harden quickly. Excessive heat may damage threads, distort small features, or weaken surface integrity.
Professor Mitsuo Niinomi, a respected titanium biomaterials researcher, has stated, “Titanium alloys possess excellent biocompatibility and high specific strength.” That combination explains their popularity in orthopedic fixation. It also raises the machining standard. A poorly controlled toolpath can leave burrs inside a thread, where a tiny defect becomes clinically significant.
This guide presents seven practical considerations for selecting and managing Swiss turning production. It examines material certification, tool selection, cutting parameters, coolant delivery, thread quality, dimensional inspection, and traceability. Each area matters. Small details matter more.
Experienced manufacturers often use sharp carbide tooling, dedicated chip control, and low-vibration setups. They may inspect critical diameters with air gauges and verify threads using calibrated gauges. Microscopic inspection can reveal torn edges that ordinary visual checks miss.
Still, no process is flawless. Tool wear can develop quietly. Inspection plans may overlook an unusual burr location. That is why process reviews should include real production evidence, not assumptions.
The strongest Swiss Turning Services For Titanium Bone Screws combine machining expertise with medical-device discipline. They document changes, challenge established settings, and investigate deviations carefully. Reliability is built gradually, one controlled feature at a time.
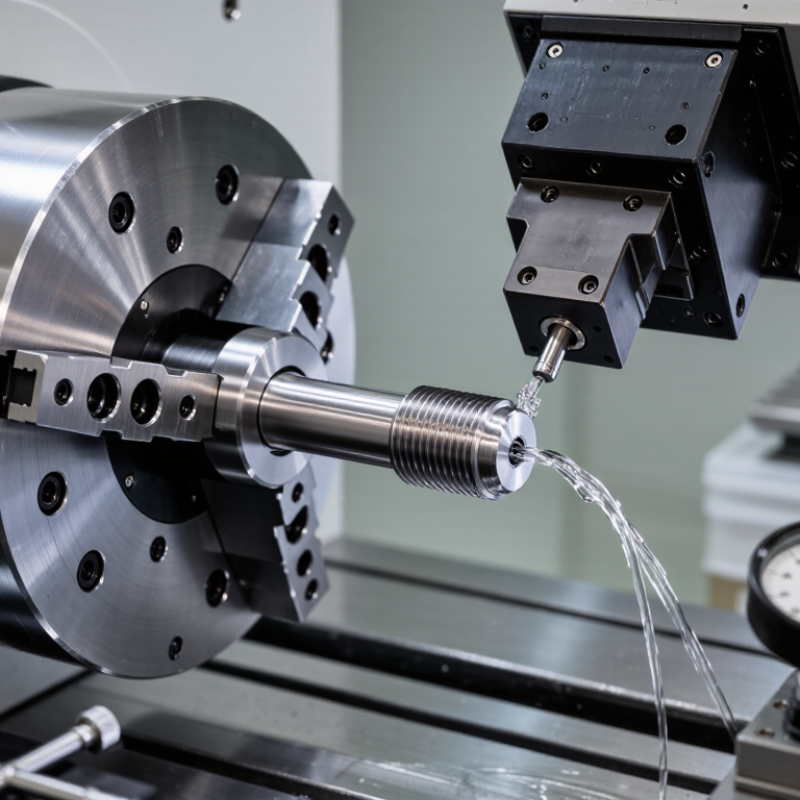
Titanium bone screws combine low density, corrosion resistance, and biocompatibility. Their strength depends on more than the alloy certificate. Thread geometry, core diameter, head design, and surface condition all affect clinical performance. A small burr can damage tissue or disturb insertion. That risk makes machining discipline essential.
Swiss turning suits these miniature components because the guide bushing supports the bar close to the cutting zone. This support helps control deflection during deep thread cutting and slender-shaft turning. Use sharp, rigid tools with suitable edge preparation. Excessive cutting pressure may cause work hardening, poor thread form, or dimensional drift. Stable coolant flow also matters. Titanium can retain heat quickly. Keep the cutting zone controlled.
Measure critical features during production, not only at the end. Check thread pitch, major diameter, head dimensions, concentricity, and runout with calibrated equipment. Inspect the surface under magnification. Look for tearing, smeared material, and embedded particles. Cleaning requires equal attention, especially around internal threads. Traceable records should connect material, tooling, inspection results, and process changes. In practice, perfect settings rarely remain perfect. Tool wear develops quietly. I once underestimated how quickly a fine edge could lose accuracy during repeated titanium runs. That detail deserves more frequent checks. Small process experiments can improve results, but every change needs documented review and controlled validation.
Swiss turning titanium bone screws demands careful grade selection and disciplined cutting control. Titanium Grade 2 offers good corrosion resistance and ductility for less demanding designs. Ti-6Al-4V ELI provides higher strength and supports many load-bearing applications. The drawing, implant specification, and validated material certificate must guide the choice. Similar-looking bars can machine very differently.
Start with conservative parameters. For Ti-6Al-4V ELI, a carbide insert may begin near 45–75 surface meters per minute. Use a steady feed, often around 0.03–0.08 millimeters per revolution for small features. Keep the depth of cut deep enough to pass below the work-hardened layer. Light rubbing is dangerous. It creates heat quickly. A sharp, positive-rake tool helps protect the thread profile. High-pressure coolant can improve chip evacuation around the guide bushing and thread-forming area.
Watch the part, not only the machine screen. Blue chips, a rough flank, or a growing burr indicate instability. In one shop trial, increasing speed seemed productive, but the thread crest softened within minutes. The better correction was sharper tooling and improved coolant direction. That result was inconvenient. It also exposed a weak assumption. Swiss machines need controlled chip breaking, especially on long titanium threads. Measure the first pieces under magnification, then verify pitch diameter, minor diameter, surface finish, and burr height through documented inspection.
Selecting titanium grades and matching carbide-tool cutting parameters
Chart: Typical starting cutting-speed values for coated carbide turning under rigid Swiss-type machining conditions. Actual values depend on tool geometry, coolant, workpiece diameter, machine rigidity, and thread or profile complexity.
Indicative starting values: CP Titanium Grade 2: 60 m/min; Ti-6Al-4V Grade 5: 40 m/min; Ti-6Al-4V ELI Grade 23: 35 m/min; Ti-6Al-7Nb: 40 m/min. Validate parameters through controlled trials and applicable medical-device process requirements.
Swiss turning titanium bone screws demands controlled heat, stable tooling, and disciplined chip management. ASM Handbook, Volume 16, lists titanium alloy thermal conductivity near 6.7 W/m·K. Heat stays close to the cutting edge.
Tip 1: Use sharp, polished carbide inserts with suitable edge strength.
Tip 2: Keep cutting speeds conservative, then adjust from measured flank wear.
Tip 3: Protect the workpiece with rigid guide-bushing support.
Tip 4: Aim high-pressure coolant directly at the tool–chip contact zone. A 2023 machining study reported that directed coolant reduced cutting temperature and improved tool life in titanium turning. Flooding the general area is not enough.
Tip 5: Use through-tool delivery when the machine supports it. ISO 5832-3 identifies Ti-6Al-4V as a common implant alloy, but its low conductivity still punishes weak cooling.
Tip 6: Choose coolant chemistry approved for medical manufacturing, and monitor concentration every shift. Small errors matter.
Tip 7: Break chips before they wrap around the guide bushing. Use a chipbreaker matched to the feed range, not merely the insert shape. Short, curled chips are safer and easier to evacuate. The U.S. National Institute for Occupational Safety and Health warns that unexpected chip movement can create serious shop-floor hazards. A practical check is simple: stop after the first few parts, inspect chip color, burr formation, and thread quality. I have seen operators increase feed too quickly after a clean trial. That decision often caused edge chipping. Titanium machining rewards patience, though production schedules rarely do.
7 Tips for Swiss Turning Services for Titanium Bone Screws
Maintaining precision starts with stable titanium machining. Grand View Research valued the global orthopedic implants market at about USD 47 billion in 2023, increasing pressure on traceable production. Tip 1: Verify titanium grade against ASTM F136 before programming. Tip 2: Use sharp, polished tools with controlled cutting speeds. Titanium work-hardens quickly. Tip 3: Keep tool wear records after every batch. A small edge defect can distort thread crests. Tip 4: Support slender screws close to the cutting zone. I would not trust long unsupported parts, even when the machine appears stable.
Threading needs more than a correct pitch setting. Tip 5: Check thread form with calibrated gauges, then inspect crest damage under magnification. Measure pitch diameter, lead, and runout separately. ISO 13485 emphasizes documented process control and full device traceability. That matters when one rejected screw must be linked to its tool, operator, and inspection record. Some teams over-polish threads. That can reduce engagement.
Surface finishing should remove burrs without rounding functional edges. Tip 6: Apply controlled microblasting or electropolishing only after validating dimensional loss. Tip 7: Confirm roughness, particles, cleanliness, and passivation using documented acceptance limits. ISO 14971 risk management supports this link between process variation and patient safety. ASTM F86 also provides recognized guidance for cleaning and passivating metallic surgical implants. A 2024 industry quality report from a major medical-device consultancy identified supplier control and process validation as persistent audit weaknesses. These findings deserve attention. Visual inspection alone is not enough.
After Swiss turning titanium bone screws, inspection should begin before cleaning. I check the head, drive recess, thread form, and tip under controlled lighting. Magnification can reveal torn material, burrs, or small chips. Gauges verify critical diameters and thread fit. Coordinate measurement may confirm length and concentricity. A visual check alone is not enough.
Cleaning must protect the surface and the geometry. I use a validated process that removes coolant, particles, and metal residue without damaging fine threads. Cleanroom-compatible brushes, filtered rinsing, and controlled drying can reduce hidden contamination. Operators should inspect difficult areas, especially beneath the screw head. One missed particle matters. However, cleaning is not always perfect, and this deserves honest review.
Validation links inspection results with patient safety and process control. Sampling plans should reflect risk, production volume, and screw complexity. Records need measurements, equipment status, operator identity, and lot traceability. Periodic revalidation is sensible after tooling, material, or cycle-time changes. I also compare first-off parts with later pieces, because tool wear can change thread quality gradually. A documented deviation should trigger investigation, not quiet correction. Temperature, lighting, and measurement technique can influence results more than expected.
| Tip | Process Stage | Critical Control Point | Recommended Practice | Typical Acceptance Criteria | Verification Method | Suggested Frequency | Required Record |
|---|---|---|---|---|---|---|---|
| 1. Confirm titanium material and traceability | Material receiving | Alloy grade, heat number, and material condition | Use implant-grade titanium alloy bar stock with documentation matching the purchase specification. Maintain lot traceability from raw material through final packaging. | Material certificate conforms to the specified grade, such as titanium alloy covered by ASTM F136 or an equivalent approved specification. | Document review and, when required, positive material identification using a validated method. | Each incoming material lot | Material certificate, heat number, inspection report, and lot genealogy |
| 2. Control Swiss turning parameters | CNC Swiss turning | Heat generation, tool wear, burr formation, and chip control | Use sharp, application-appropriate carbide tooling, adequate coolant delivery, stable workholding, and documented parameter ranges. Avoid uncontrolled rubbing or excessive dwell time on titanium surfaces. | No visible tearing, chatter, overheating, embedded chips, or unacceptable burrs. Critical dimensions remain within the approved drawing tolerances. | First-piece inspection, in-process dimensional checks, visual inspection, and tool-life monitoring. | First piece, tool change, setup change, and defined production intervals | Machine setup sheet, tool-life log, in-process inspection results, and nonconformance records |
| 3. Inspect thread and functional features | Dimensional and functional inspection | Thread profile, pitch, major diameter, head geometry, drive recess, and cannulation if applicable | Inspect features against the controlled engineering drawing using calibrated gauges and measurement equipment. Protect threads from contact damage during handling. | Thread gauge passes as specified; critical dimensions, form, runout, and drive geometry meet drawing requirements; no damaged or incomplete thread turns. | Optical measurement, calibrated micrometer or vision system, thread plug/ring gauges, and magnified visual inspection. | 100% inspection of critical features when specified; otherwise per the approved control plan | Inspection report, gauge identification, calibration status, and sample size |
| 4. Remove burrs without altering geometry | Deburring and edge finishing | Thread crest, cutting flute, cannulation entrance, and drive recess | Use a validated manual or automated deburring method. Prevent excessive edge rounding, tool marks, and loose particles. Do not use abrasive media that can become embedded. | Edges are free from loose burrs and sharp unintended projections; thread and drive features remain functional and within specification. | Magnified visual inspection, tactile inspection where appropriate, and functional gauging. | Every part for critical bone-contacting and mating features | Deburring work instruction, operator checklist, and inspection results |
| 5. Clean and dry thoroughly | Post-machining cleaning | Residual coolant, cutting oil, chips, particles, and moisture | Use a validated aqueous or solvent-based cleaning process compatible with titanium and the product specification. Include flushing of cannulations and recesses, followed by controlled drying. | No visible oil, chips, residue, water spots, or loose particles. Cleaning chemicals are removed to the validated process limit. | Visual inspection under controlled lighting, cleanliness testing, rinse-water monitoring, and periodic residue or particle analysis. | Each batch, with periodic process validation and revalidation after changes | Cleaning recipe, bath-control log, drying record, and cleanliness test results |
| 6. Validate surface condition and corrosion resistance | Surface treatment and validation | Surface roughness, discoloration, embedded contaminants, and treatment consistency | Apply only approved surface treatments, such as passivation or anodizing when required by the design. Validate process chemistry, time, temperature, and rinsing. | Surface appearance and roughness meet the drawing or process specification; no pitting, peeling, foreign-metal contamination, or unexpected color variation. | Surface roughness measurement, visual inspection, chemical-process checks, and applicable corrosion or contamination testing. | Each treated batch and after process, chemical, or equipment changes | Treatment batch record, solution-monitoring log, surface inspection report, and validation protocol |
| 7. Complete final validation and release review | Final inspection and release | Conformity, cleanliness, packaging integrity, and record completeness | Review inspection results against the approved specification and risk-based control plan. Verify packaging protects threads and prevents contamination during storage and transport. | All required characteristics conform; product is clean, undamaged, correctly identified, and released only after authorized quality approval. | Final dimensional audit, visual examination, functional checks, document review, and approved sampling or 100% inspection. | Each production lot | Device history record, certificate of conformity, final inspection report, and release authorization |
Note: Acceptance limits should be taken from the approved engineering drawing, risk analysis, process validation, and applicable medical-device requirements rather than from generic values.