
Contract Manufacturing for Injection Molded Plastic Products in North America
(800) 824.0607
Choosing a Micro Sprinkler Irrigation system is not simply a matter of comparing nozzle prices. The right setup must suit the crop, soil, water supply, and shape of the growing area. A small vegetable bed may need gentle, even coverage, while young orchard trees need water delivered near their developing root zones. Look closely at droplet size, operating pressure, spacing, filtration, and maintenance access. Tiny details matter.
Irrigation specialist Dr. Michael Haman offers a useful reminder: “Good irrigation starts with matching water delivery to the soil and the plants.” That principle guides the seven tips in this article. It also means checking real site conditions, not relying only on a product label. Measure pressure at the system, inspect water quality, and note how quickly your soil absorbs moisture. Watch the edges. A dry strip beside a wet patch can reveal poor spacing or uneven pressure.
There is no perfect layout for every field. Even a carefully planned system may need adjustment after installation, and that is worth acknowledging. Wind, clogged emitters, or changing crop size can alter coverage over time. These tips will help you compare system options, avoid common mismatches, and plan for upkeep before small problems become visible in the plants. Start with the land you have.
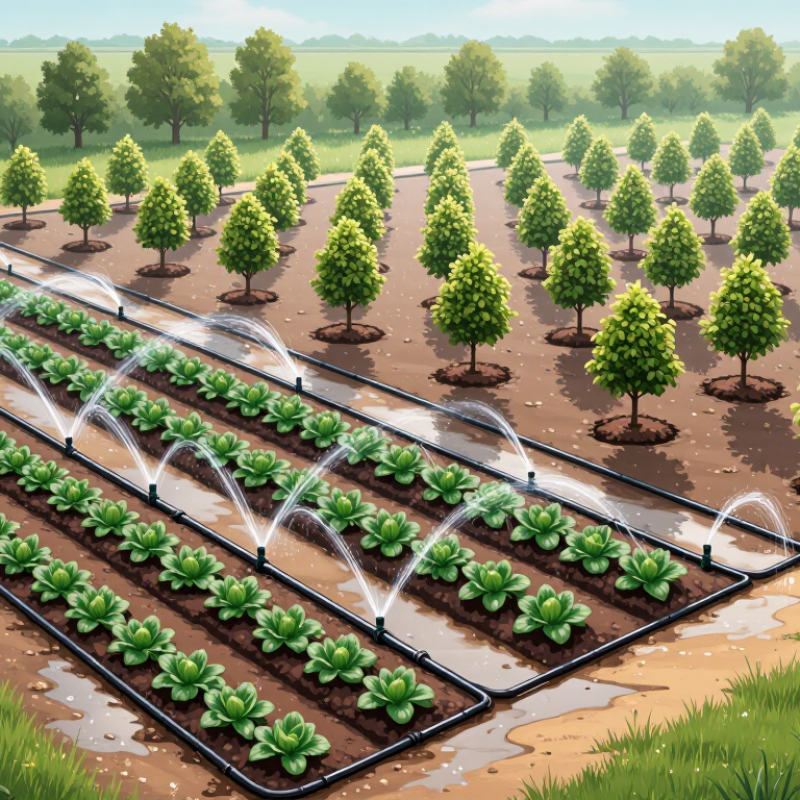
A micro sprinkler system carries water from a source through a filter, pressure regulator, and network of small pipes. Short tubes or risers feed individual sprinkler heads. Each head releases a gentle spray in a circle or fan, wetting a limited area rather than a whole field. Small details matter. Pressure that is too low can shrink the spray pattern; pressure that is too high may create fine droplets that drift in wind. The filter helps keep grit from clogging the narrow outlets, but it needs regular cleaning.
Coverage depends on nozzle type, spacing, water pressure, and plant growth. A head placed beside a young tree may water well at first, then miss the expanding root zone. In practice, a layout can look tidy on paper and still leave a dry crescent between sprinklers. Set out catch cups, run the system, and compare how much water each collects. Adjust spacing or run time where coverage is uneven. Not always. Sloping ground, wind, and changing soil can make even a careful setup imperfect. Check emitters for blockages, leaks, and tilted risers during routine watering. These small checks help keep delivery consistent without assuming every plant needs the same amount.
Example water delivery from one micro sprinkler with a nominal flow rate of 40 L/h.
The values are calculated as nominal flow rate × run time. For example, 40 L/h × 1 hour = 40 L. Actual output varies with the sprinkler model, operating pressure, and system conditions.
Start with the crop, not the sprinkler. Map plant spacing, rooting depth, and the wetting pattern needed during establishment and peak growth. FAO’s Irrigation and Drainage Paper 56 estimates crop water use with ETc = Kc × ETo, linking crop evapotranspiration to a crop coefficient and local reference evapotranspiration. Use local weather data where possible; a generic schedule can miss a hot, windy week. Check whether foliage, flowers, or fruit are sensitive to prolonged wetting. Small details matter.
Soil changes the answer. Sandy soil drains quickly, so shorter, more frequent runs may reduce deep losses; clay can absorb water slowly and may puddle under excessive application. A soil test and a simple infiltration check are more useful than guessing from surface appearance. Measure water pressure and flow at the farthest emitters, too. A wet patch near the pump can hide dry plants at the end of a line. FAO AQUASTAT reports that agriculture accounts for about 70% of global freshwater withdrawals. That is a global estimate, not a farm-level target. Keep records of run time, rainfall, and soil moisture; I still find visual checks easy to overtrust.
Micro sprinklers differ in how they distribute water. Adjustable heads suit irregular beds, while full-circle heads work well in open spaces. Half-circle patterns can water along a fence without soaking a path. For seedlings, a gentle, low-flow spray helps limit soil disturbance. Taller plants may need a higher spray pattern, but leaves can intercept water.
Spacing should follow the wetting pattern, not just the distance between plants. Check the soil first. On sandy ground, water moves downward quickly, so closer spacing or shorter cycles may help. Clay holds water longer, but puddles can form if application is too fast. Place catch cups across the bed, run the system, and compare the collected amounts. A dry cup near a bed’s edge signals a coverage gap.
Wind can distort fine spray, especially in exposed gardens. I have sometimes treated a tidy layout as proof of even coverage; it isn’t. Test the system on a calm day, then inspect it again under typical conditions. Confirm that pressure stays within the head’s operating range, since low pressure can shrink coverage and excessive pressure can create mist. Clean filters and nozzles when flow becomes uneven. A small mismatch in spacing may still need adjustment after plants mature.
Micro sprinklers work best when pressure stays within the emitter’s specified range. Too little pressure can leave the far end of a line dry; too much may create mist and uneven coverage. Check the system with a pressure gauge while water is flowing, not only at the tap. A regulator can help, but its setting should match the equipment instructions. Small changes matter. Pipe length and elevation can affect pressure more than expected.
Filtration should match both the water source and the sprinkler’s minimum filtration requirement. Fine particles from a pond or storage tank may clog small outlets, so inspect the filter after the first few watering cycles. A flushable screen or disc filter makes routine cleaning easier. Check it wet. For control, use separate zones for plants with different water needs, and set run times around soil and weather conditions. A timer is convenient, though it cannot know when a shaded bed is still damp. A soil-moisture sensor or a manual override adds flexibility. I have seen simple schedules miss changing conditions; that is worth reviewing, not hiding. Keep valves accessible, and test each zone before planting densely.
| Tip | What to compare | Practical comparison | Selection check |
|---|---|---|---|
| 1. Match operating pressure | Required pressure at the sprinkler inlet | Many micro-sprinklers are designed to operate around 15–30 psi (about 1.0–2.1 bar), but the correct range varies by model and nozzle. Too little pressure can reduce throw and distribution uniformity; excess pressure can increase misting and stress fittings. | Check the product specification and measure pressure while the zone is running, not only when the system is closed. |
| 2. Account for pressure loss | Elevation, pipe length, fittings, and flow | Pressure at the pump or supply can be higher than pressure at the sprinklers. Friction loss rises with flow and smaller pipe diameter; uphill sections also reduce available pressure by roughly 0.43 psi per vertical foot (about 0.098 bar per metre). | Size pipes for the zone flow and verify pressure at the hydraulically farthest or highest sprinkler. |
| 3. Choose suitable filtration | Filter type, screen rating, and water source | Screen filters are commonly used for relatively clean water; disc or media filters may be more suitable for water with organic matter or heavier sediment. A 120-mesh screen has openings of roughly 125 microns, while 200 mesh is roughly 74 microns; mesh-to-micron values are approximate and depend on the screen standard. | Follow the sprinkler maker’s filtration requirement and select a filter for the actual water quality, not mesh number alone. |
| 4. Compare pressure regulation | Regulator setting and pressure variation across the zone | A pressure regulator can keep operating pressure within a suitable range when supply pressure is higher or fluctuates. Pressure-compensating outlets can help maintain more consistent discharge over their specified pressure range, but they cannot correct pressure below their operating minimum. | Set the regulator to the sprinkler’s specified pressure and confirm that sufficient pressure remains after filtration and pipe losses. |
| 5. Size zones by flow | Sprinkler discharge, spacing, and available supply | Total zone demand is the sum of the discharge rates of all sprinklers operating together. Nozzle size and pressure affect discharge, so sprinklers with different flow rates may need separate zones to achieve even application. | Compare the calculated zone flow with the supply capacity and pipe design; use manufacturer flow tables for the selected nozzle and pressure. |
| 6. Select an appropriate control setup | Manual valves, timer controllers, and automatic valves | Manual control is simple for small systems but requires attendance. A timer with compatible zone valves can automate schedules. Separate zones allow different watering times for areas with different plants, soil, or sun exposure. | Check valve size, operating pressure, power requirements, and whether the controller supports the number of zones required. |
| 7. Plan for maintenance and monitoring | Filter cleaning, flushing, and scheduling adjustments | Filters need inspection and cleaning as they collect debris. Flushable line ends make it easier to remove sediment. Soil-moisture or rain sensors can help prevent unnecessary watering, but schedules still need adjustment for crop needs, weather, and soil conditions. | Provide accessible filter and flush points, and periodically check pressure, clogged outlets, and sprinkler coverage. |
A micro sprinkler system works best when its layout matches the plants, soil, and water supply. Sketch each bed and mark trees, paths, and slopes before buying tubing. Check the available flow rate and pressure; a pressure gauge at the supply point can reveal problems early. Sandy soil may need shorter, more frequent watering, while clay often needs slower application. These are useful starting points, not fixed rules.
Tips: Leave room around young plants for growth. Place sprinklers to overlap lightly, since wind can leave dry patches. Use a filter to catch grit before it reaches the nozzles. Keep a few spare emitters on hand. Small parts disappear.
During installation, flush the lines before attaching sprinkler heads, then run the system and inspect every connection. Watch for puddles, weak spray, or water hitting walls instead of roots. One section may need adjustment after the first week; soil and wind rarely behave exactly as expected. Keep a simple map of valves and tubing, even if it feels unnecessary.
For maintenance, clean clogged nozzles and check filters regularly, especially when the water carries sediment. Seasonal changes may also affect watering needs. If you expand the garden, calculate whether the supply can support extra sprinklers before adding a new branch. More outlets can reduce pressure across the whole system. Recheck coverage after each change, and be willing to revise a layout that looked sensible on paper.