
Contract Manufacturing for Injection Molded Plastic Products in North America
(800) 824.0607
Choosing the right Plumbing Pipe Cutter can make a repair cleaner, faster, and more predictable. The wrong tool may crush soft tubing, leave a rough edge, or demand repeated effort in a cramped cabinet. Small details matter. Pipe material, diameter, access, and cutting frequency all affect which design will work well.
A useful cutter should match the pipes you actually handle, not simply promise the widest capacity. For copper, plastic, or multilayer tubing, check the manufacturer’s material guidance before buying. Look closely at blade quality, adjustment smoothness, handle comfort, and replacement-part availability. These details become obvious when you make several cuts beneath a sink, where space is tight and awkward wrist angles are common. A clean cut helps prepare a pipe for fitting, but it does not replace proper measurement or careful installation.
The seven tips in this guide focus on practical checks you can make before choosing a tool. They cover compatibility, cutting capacity, build quality, ease of use, and value over time. No cutter is perfect. I have found that a compact model can be convenient yet frustrating on larger pipe, while a heavy-duty tool may feel excessive for occasional household repairs. That trade-off is easy to overlook. Use the points below to compare options against your own projects, and consult product instructions whenever material compatibility or safe operation is unclear.
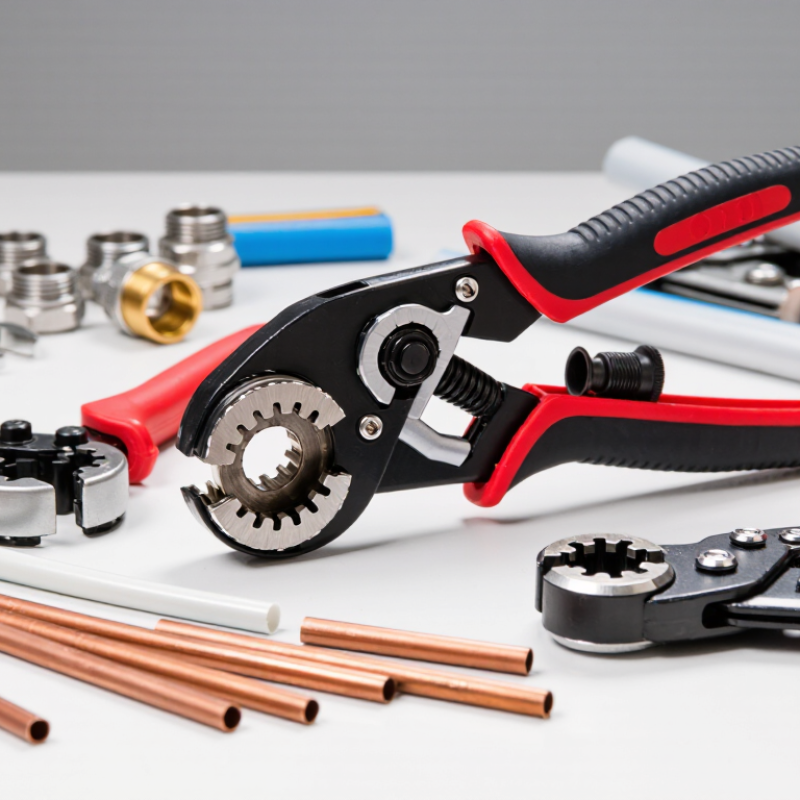
A pipe cutter should match the material, diameter, and working space—not just the job title. Copper tubing usually suits a compact rotary cutter, while plastic pipe may need a cutter designed to avoid crushing its softer walls. Steel and other harder metals can require a heavier tool and more effort. Check the cutter’s stated size range against the pipe’s actual outside diameter; nominal pipe sizes can be confusing. Measure twice. A pipe that looks close may still sit poorly in the tool.
Think about the cut you need. A rotary cutter can make a neat, square edge, but its wheel needs room to turn around the pipe. In a tight cabinet, a mini cutter may be easier to position, though slower. For plastic, a ratcheting cutter can work well on suitable sizes, but stop if the pipe deforms or the cut starts to angle. That’s a warning. After cutting, inspect the edge for burrs, cracks, or a raised lip, then deburr it when the material requires it. I’ve found that rushing this check is an easy mistake; even a clean-looking cut can affect how a fitting seats. If you’re unsure about material compatibility or the pipe’s condition, check the tool instructions or ask a qualified plumbing professional.
Choosing a pipe cutter starts with the pipe material and the space around it. A rotary tubing cutter works well on copper and other compatible metal tubing. Its wheel makes a controlled cut, but the tool needs room to turn. In a cramped cabinet, a compact close-quarter cutter may fit better. Expect slower progress.
For PVC or CPVC, use a cutter designed for plastic pipe. A ratcheting model can handle larger diameters with less hand force, while a smaller scissor-style cutter suits narrow pipe. Check the tool’s stated capacity before buying. Plastic can deform if the blade is dull or the pipe is poorly supported. It happens more easily than many people expect.
PEX calls for a sharp PEX-specific cutter, which helps leave a clean, square end for fittings. For thick steel or cast-iron pipe, a standard copper cutter is not the answer; use a suitable heavy-duty cutter or another method specified for that material. Compare cut quality, access, and replacement-wheel availability. A cheaper tool may work, but not always cleanly. Test it on scrap pipe when possible, and inspect the cut for burrs or distortion before joining.
Choosing a pipe cutter starts with measuring the pipe, not guessing. Check its cutting capacity against the pipe’s outside diameter and material. A tool that fits tightly should still turn smoothly around the pipe. For repeated work, choose a model with a comfortable grip and controlled adjustment. I once selected a cutter that matched the diameter but struggled with thick-walled tubing. That mistake taught me to check wall thickness, not diameter alone. Small detail.
Blade design affects both speed and cut quality. Look for a hardened blade with a clean, narrow edge for copper or plastic pipe. A replaceable blade can reduce downtime during regular maintenance. Some cutters use a reaming feature, which helps remove sharp internal edges after cutting. Test the adjustment wheel before buying. It should move steadily, without sudden jumps or excessive looseness.
Compatibility deserves careful attention. Confirm that the cutter suits the pipe material, diameter range, and working space. A compact tool may perform better near walls, while a longer handle can improve leverage on thicker pipe. Avoid forcing a blade designed for soft tubing onto rigid materials. Read the manufacturer’s technical specifications and compare them with your actual jobs. Field conditions can expose weaknesses that product photos hide. I still check clearance twice, because one overlooked fitting can make a good cutter useless.
A plumbing pipe cutter should feel controlled in your hand, not awkward or slippery. Turn the adjustment knob and check whether the cutting wheel moves smoothly. Try the motion on a scrap pipe if possible. A stiff knob or cramped grip can make repeated cuts tiring, especially in a cabinet or under a sink. Small details matter.
Durability depends on more than a heavy frame. Look for a cutter that sits squarely on the pipe, with a wheel that does not wobble under light pressure. A clean, even cut is easier to deburr and fit. Match the tool’s stated capacity and material range to your pipes; a compact cutter may struggle with larger tubing. I once assumed a sturdier tool would always be easier to use. It wasn’t—the extra weight became tiring during overhead work.
Consider maintenance before buying. Pipe chips can collect around the wheel, so check whether the cutting area is easy to brush clean. Dry the tool after use, and follow its care instructions for any lubrication. Replacement wheels are useful when cuts begin to take more turns or leave rough edges. If a cutter needs frequent adjustment, that upkeep may outweigh a low purchase price.
Match Safety Features and Cost to Your Workload
Tip: Start with your daily workload. For a few copper repairs each month, a compact cutter with a secure locking knob may be enough. For repeated cuts on a job site, choose a durable tool with a comfortable grip and replaceable cutting wheels. Check its rated pipe material and diameter before buying. A cutter made for copper may not suit plastic pipe.
Tip: Look for practical safety details, not just a low price. A stable grip helps prevent slipping, while a blade guard or locking mechanism can protect fingers during storage. Wear eye protection, especially when trimming older pipe; small metal chips can travel farther than expected. Grip matters. I have found that a stiff adjustment knob can make a simple cut feel awkward, even when the tool seems sturdy. That is worth checking in person.
Tip: Compare the cost of upkeep with the number of cuts you expect. A cheaper cutter may work well for occasional repairs, but dull wheels can leave rough edges and require extra deburring. For frequent use, spare wheels and easy maintenance may save time. Not always. Keep the tool clean, inspect it for damage, and avoid forcing it through pipe. A slower, controlled cut is safer and usually leaves a cleaner edge.