Contract Manufacturing for Injection Molded Plastic Products in North America
(800) 824.0607
A mini plastic injection molding machine is a compact system that melts plastic pellets, injects the melt into a mold, and forms a solid part as it cools. Its smaller footprint and lower material capacity can suit prototyping, training, research, and short production runs. A typical unit still relies on the same basic elements as larger equipment: a heated barrel, screw or plunger, clamping mechanism, controls, and a matched mold. Small does not mean simple.
The word “mini” is not a universal engineering specification. That distinction is easy to miss. Before comparing machines, check the shot capacity, clamping force, injection pressure, mold dimensions, and supported materials against the parts you plan to make. For example, a small housing with thin walls may need different settings from a thicker test piece, even when both fit the same mold area. Review the manufacturer’s technical data, then confirm performance with a controlled trial; actual results depend on the resin, mold design, and process settings. There are limits. A compact machine may not provide enough force, capacity, or temperature control for every job, and an impressive product photo cannot answer those questions. This guide explains how these machines work, where they are useful, and which specifications deserve close attention. It also considers their trade-offs, because the smallest option is not always the most practical one.
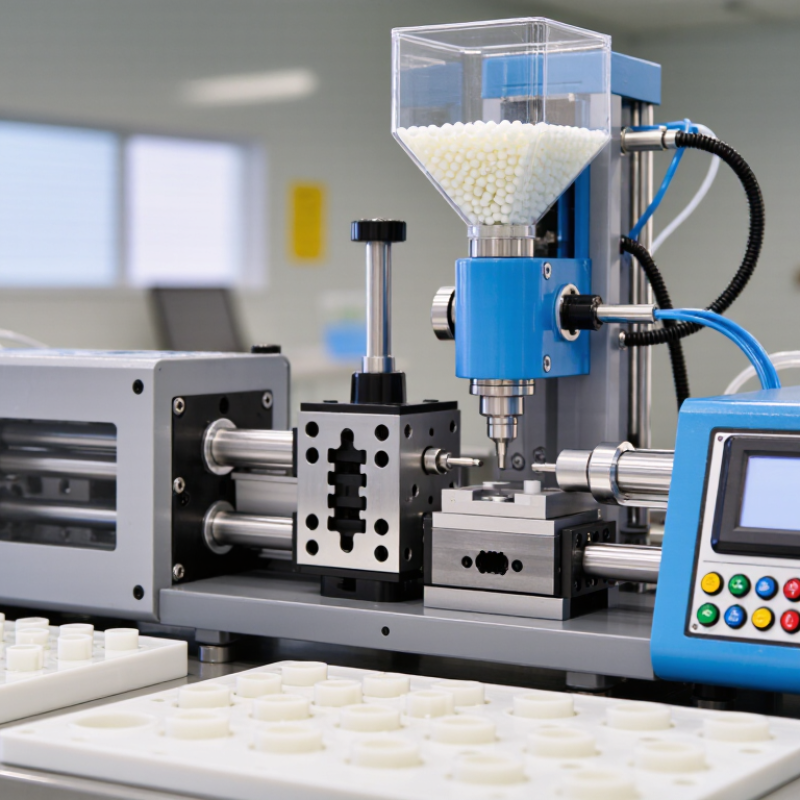
A mini plastic injection molding machine is defined less by a fixed size than by how its capacity, layout, and controls suit small-scale molding. There is no universal cutoff. Buyers should check clamping force, maximum shot size, mold space, and machine footprint together. A compact frame may fit on a workbench, yet still need clearance for opening the mold and removing parts.
Its defining feature is a modest injection unit matched to smaller molds and lower material volumes. The machine heats pellets in a barrel, then drives the melt through a nozzle into a closed mold. Useful specifications include shot-weight range, platen dimensions, tie-bar spacing, screw diameter, and temperature control. These details show whether a particular mold can be mounted and filled consistently. Small, but capable.
A good definition also includes repeatability and practical operation. A mini machine should let an operator adjust injection pressure, speed, and temperature, then reproduce settings across successive cycles. In practice, tiny parts can expose problems quickly: a slight temperature shift may leave a short shot or rough edge. Check the materials and mold design the machine supports; not every compact unit handles every resin or complex geometry. The term “mini” can be vague, so compare measured capacity and sample-part quality, not appearance alone. A smaller machine saves space, though setup and maintenance still take care.
A mini injection molding machine is a compact machine designed to produce small plastic parts using relatively low clamping force. There is no universal industry cutoff for “mini,” so clamping-force ranges are best treated as a practical guide rather than a formal standard.
Approximate clamping-force ranges shown in metric tonnes-force (tf). Actual machine classifications vary, and some conventional machines exceed the range shown.
A mini plastic injection molding machine forms parts by closing a mold, melting material, and injecting it into the cavity. Its compact size does not make the controls less important. Not so simple.
Clamp force comes from the clamping unit, which may use a toggle mechanism or hydraulic actuation. The platen, tie bars, and mold all affect how force is distributed. Operators set the force to resist cavity pressure without overloading the mold. Too little may allow flash along the parting line; too much can strain the mold or machine. The required force also depends on projected part area and material behavior.
Shot size is controlled by the metering system. In a screw-driven machine, screw rotation and retraction determine the melt volume prepared for each cycle; a check valve helps maintain consistent delivery. Injection speed depends on the drive and its control system, which move the screw or plunger forward. Faster movement can fill thin sections, but the result also depends on melt temperature, nozzle size, and gate design. A setting on the screen is not the whole story. Small parts expose flaws quickly, and actual flow may differ from the expected response.
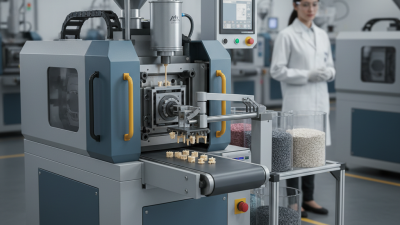
A mini plastic injection molding machine turns measured pellets into small, repeatable parts. The cycle begins inside a heated barrel. A screw rotates, conveys, and melts the material. Temperature control matters. A few degrees can change flow, surface finish, and filling pressure.
When enough melt collects, the screw moves forward like a piston. It pushes the plastic through a narrow nozzle and into the closed mold. Injection speed fills thin sections before the material freezes. Holding pressure then compensates for shrinkage as the part cools. This stage is easy to underestimate. A shiny surface may still hide internal stress.
The mold opens after cooling, and ejector pins release the part onto a tray. The screw then prepares the next shot. In practical testing, I check sprue removal, flash, and dimensional drift after several cycles. Small machines can respond quickly, but their limited barrel volume may amplify temperature changes. That is not always convenient.
PlasticsEurope reported 413.8 million tonnes of global plastics production in 2023, showing the scale behind even compact processing equipment. The OECD’s Global Plastics Outlook estimated that only 9% of plastic waste was ultimately recycled in 2019. Material selection and scrap control therefore belong inside the molding discussion, not after it. A mini machine uses less material per trial, yet poor settings can still create avoidable waste.
A mini plastic injection molding machine uses heat and pressure to shape small plastic parts. For reliable results, track the resin, melt temperature, cycle time, and part quality. Polypropylene (PP) is commonly processed around 190–260°C, while ABS often runs around 220–260°C. These are working ranges, not fixed recipes. Resin grade, colorants, screw design, and machine calibration can shift the ideal settings. A displayed barrel temperature may not match the actual melt temperature. Check the material supplier’s data sheet, then record settings alongside visible results, such as short shots, sink marks, or warping.
Tips: Dry ABS as specified for its grade, and keep pellets sealed between runs. Start near the middle of the recommended range. Change one setting at a time. Small tests help reveal whether temperature, pressure, or cooling is causing a defect. Don’t assume a clean-looking part proves the process is stable; dimensions may drift as the machine warms up.
For PP, excessive heat or long residence time can contribute to material degradation. ABS may need careful drying to reduce surface blemishes. Track actual cycle conditions, including injection pressure, hold time, and cooling time. A simple log is useful, though it may miss changes in ambient temperature or operator technique. Review the data with measured parts, not memory alone.
A mini plastic injection molding machine is a compact system that melts plastic pellets and presses the material into a shaped mold. Its smaller barrel, clamp, and footprint make it useful where floor space and material consumption matter. In practice, I have found these machines especially valuable for early prototypes. A designer can produce a small housing, clip, or medical-device concept within hours, then inspect fit and surface detail before ordering larger tooling. Results still depend on mold quality, drying conditions, temperature control, and operator judgment.
Compact machines also fit micro-molding and small-batch production. They can process tiny shots with less material waste, which helps when a resin is expensive or a component weighs only a few grams. However, micro-molding is not simply miniature molding. Thin walls, narrow gates, and short cooling cycles require careful process control. Small-batch runs may work well for replacement parts, pilot orders, and customized components. Production speed may disappoint when demand increases. That assumption can be wrong.
Tips: Measure the required shot size before choosing a machine. Record melt temperature, mold temperature, injection pressure, and cooling time for every trial. Use a simple sample checklist with weight, dimensions, flash, sink marks, and warpage. Start with a basic mold design. Complex geometry often hides process problems. Keep safety guards closed, inspect electrical connections, and follow the machine’s operating instructions. A compact machine saves space, but it does not remove the need for ventilation, training, and disciplined quality checks.
A mini plastic injection molding machine is a compact machine for producing relatively small molded parts. “Mini” is not a standardized machine classification, so the ranges below are practical planning examples, not specifications or limits that apply to every machine. Confirm suitability with the machine and mold suppliers.
| Application | Typical Part Scale | Indicative Clamping Force | Indicative Shot Size | Where a Compact Machine Fits | Key Limitation to Check |
|---|---|---|---|---|---|
| Prototyping | Small functional parts, often a few grams to several dozen grams | Approximately 1–30 metric tonnes-force, depending on projected part area and material | Often a few grams to around 100 g of polystyrene-equivalent capacity | Testing part geometry, fit, assembly, and material behavior before committing to larger production tooling | Prototype tooling and process settings may not reproduce the surface finish, cooling, or cycle time of a production mold |
| Micro-molding | Very small, lightweight components; individual parts may weigh well below 1 g | Often a few tonnes-force to roughly 20 tonnes-force, but mold area and cavity count matter | Small, accurately controlled shots; required capacity depends on the part, runner, and material | Producing small components when the machine can control shot volume, injection speed, and repeatability at the required scale | Shot-size control, venting, tool precision, and process stability can matter more than maximum clamp force |
| Small-batch runs | Small parts or short runs of larger parts within the machine’s mold and shot-size limits | Selected to resist mold opening; commonly in the low-to-moderate tens of tonnes-force for compact setups | Matched to the total part-and-runner volume for each cycle | Making limited quantities, replacement parts, pilot runs, or items with intermittent demand | Compare cycle time, operator time, mold changes, and machine uptime with the cost of other production methods |
| Insert molding | Small parts molded around metal or other compatible inserts | Determined by projected area, cavity layout, and the material’s processing conditions | Part-and-runner shot volume, plus any process allowance required for the mold | Low-volume parts that combine a molded plastic body with an insert, provided loading and alignment can be managed safely | Insert placement, retention, mold design, and operator safety can add complexity and cycle time |
| Teaching and process development | Small demonstration parts and test specimens | Varies by machine and mold; modest force may be sufficient for appropriately sized tools | Small to moderate, depending on the machine’s injection unit | Demonstrating molding fundamentals, testing a material, or developing an initial process with limited floor space | Check guarding, temperature controls, training requirements, and the machine’s permitted materials and operating conditions |