
Contract Manufacturing for Injection Molded Plastic Products in North America
(800) 824.0607
When a Gas Tank Cap no longer clicks, the change can feel small but leave you wondering whether the tank is sealed. That clicking sound usually comes from a ratcheting mechanism that limits how tightly the cap turns. Not every vehicle uses the same design, though, and some have capless fuel systems. Check your owner’s manual before assuming the cap should click.
Common causes include worn ratchet teeth, damaged threads, dirt around the filler neck, or a replacement cap that does not match the vehicle. A cap can also feel loose if it starts at an angle. Look closely. With the vehicle parked and the engine off, remove the cap and inspect its seal and threads for cracks, grit, or visible wear. Then reinstall it gently, keeping it straight. Do not force it.
A missing click does not automatically mean fuel is leaking, and an illuminated check-engine light can have several causes. Still, a cap that will not tighten or sit firmly deserves attention. If you notice a strong gasoline smell, visible leakage, or repeated warning lights, stop troubleshooting and have the vehicle checked by a qualified technician. Small parts matter. The click is useful, but it is not a complete seal test. A correct replacement cap and a careful inspection can help narrow down the cause without guesswork. I would not ignore a cap that suddenly feels different; sometimes the explanation is simple, but the sign alone cannot confirm it.
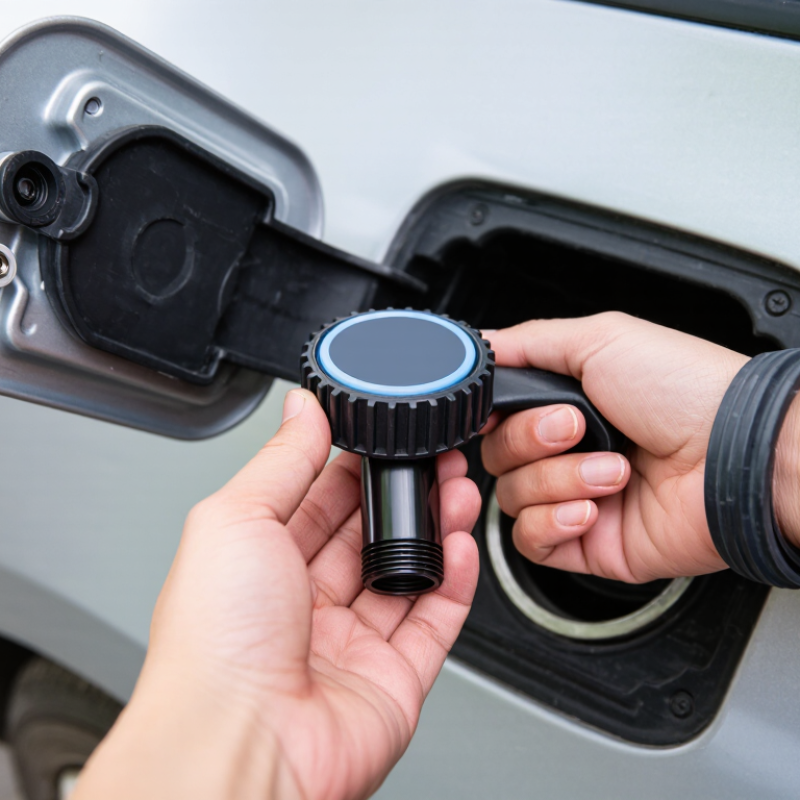
A properly sealed gas cap often clicks because a small ratcheting mechanism slips when the cap reaches its intended tightness. As you turn it clockwise, the cap’s gasket presses against the filler-neck opening. The click is a useful signal, not proof that every part is perfect. Not every cap clicks. Some designs stop firmly without an audible snap, so check the vehicle manual before assuming something is wrong.
If your cap usually clicks but now turns silently, inspect its threads and rubber seal. Look for cracks, flattening, dirt, or fuel residue, and check the filler neck for visible damage. A crooked cap may not engage correctly; remove it and try again, keeping it level as you turn. I’ve found that a rushed twist can feel tight before the threads are properly seated. Don’t force it or keep turning after repeated clicks. If the cap feels loose, the seal looks damaged, or a fuel-system warning remains, have the cap and filler neck checked by a qualified technician.
Tips: Turn the cap slowly until it seats, then listen and feel for a click if your design uses one. Keep the sealing surfaces clean, and replace a visibly worn cap with the specified type. A click helps, but the seal matters more.
A gas cap usually clicks when its ratcheting mechanism reaches the correct tightness. If it turns without clicking, the small internal clutch may be worn or broken. A cap can look fine and still fail inside. That’s frustrating.
Dirt or grit on the threads can also stop the cap from seating evenly. Check the cap and filler-neck opening in good light. Look for cracked plastic, flattened seals, damaged threads, or debris. A cap that sits crooked may keep spinning or feel unusually loose. The filler neck itself can be bent or worn, though that is less common. Using a cap that does not fit the vehicle properly can cause similar symptoms.
Try removing the cap and gently turning it back on until it sits square. Don’t force it. If it still will not click, replacing a visibly worn cap is often a sensible first step. I wouldn’t assume the cap is the only cause, though. A persistent fuel smell, a loose-fitting replacement, or a warning light deserves attention from a qualified technician. Small faults can be easy to miss.
A gas cap that does not click may be loose, worn, or simply designed with a different feel. Park safely, switch off the engine, and let the filler area cool before checking it. Remove the cap and inspect its threads for dirt, cracks, or flattened edges. A little grit can stop it from seating properly. Wipe the cap with a clean, dry cloth.
Look closely at the rubber seal. It should sit evenly and feel flexible, not split, brittle, or permanently flattened. Then inspect the filler neck’s rim and threads with a flashlight. Check for dents, rust, debris, or damage that could keep the cap from sealing. Take your time. The problem is easy to overlook.
Reinstall the cap straight, then turn it gently until it seats. Do not force it; cross-threading can damage the cap or neck. Some caps click only once, while others make several clicks, so sound alone is not a dependable test. If the seal looks sound but the cap still feels loose, or a fuel-system warning remains after several drives, have a qualified mechanic inspect the filler neck and sealing system. A quick visual check helps, but it cannot confirm every leak.
A gas cap usually clicks when its ratcheting mechanism reaches the correct tightness. If it turns without clicking, remove it and inspect the cap and filler neck in good light. Look for cracked rubber, worn threads, dirt, or a bent edge. Wipe the sealing surface with a clean, dry cloth. Don’t use tools or force the cap; damaged plastic can make the seal worse. Small grit matters.
Reinstall the cap by centering it and turning it clockwise until you hear several clicks. If it still spins freely, feels loose, or has a split seal, replace it with a cap specified for your vehicle. Check the owner’s manual or a reliable parts reference for the correct fit; caps that look alike may not seal alike. A rushed check can miss damage around the filler opening. That’s easy to overlook.
After fitting a replacement, drive normally and allow time for the vehicle’s emissions system to recheck the seal. If a fuel-cap warning or check-engine light remains, the cap may not be the only cause. A damaged filler neck or another leak can produce similar symptoms. Avoid driving if you smell strong fuel vapors, and have a qualified technician inspect it.
| What You Notice | Possible Cause | What to Check or Do | When to Replace the Cap |
|---|---|---|---|
| The cap turns but does not make its usual ratcheting clicks. | The cap’s ratcheting mechanism may be worn, damaged, or designed to seal without an audible click. | Remove the cap and check its manual or vehicle instructions. Refit it squarely and turn it clockwise until it seats. Do not force it. | Replace it if the mechanism is broken, the cap will not stay secure, or it fails to seal. |
| The cap catches, binds, or sits at an angle. | The cap may be cross-threaded, or dirt or damage may be interfering with the threads. | Remove the cap and inspect the cap and filler-neck threads. Wipe away loose dirt with a clean cloth, then align the cap and start turning gently. | Replace a cap with cracked, stripped, or badly worn threads. Have a damaged filler neck inspected. |
| The cap tightens but the rubber seal looks flattened, cracked, or missing. | A worn or damaged seal may prevent the cap from closing the fuel system properly. | Inspect the sealing surface and remove debris. Use only a cap specified for the vehicle; avoid applying oil or grease unless the vehicle instructions permit it. | Replace the cap if its seal is cracked, hardened, torn, or detached. |
| The cap seems loose after tightening or comes off easily. | The cap may be the wrong type, its locking features may be worn, or the filler-neck threads may be damaged. | Confirm the cap is correct for the vehicle and that it is aligned. Check for damage to both the cap and filler neck. | Replace a loose or incompatible cap. If a correct new cap will not secure, have the filler neck checked. |
| The check-engine light appears after refueling. | A loose, missing, or poorly sealing cap can contribute to an evaporative-emissions-system leak, though other faults can also trigger the light. | With the vehicle safely parked, refit the cap until secure. The light may take several trips to turn off; a diagnostic scan may be needed if it remains on. | Replace the cap if it cannot seal. Seek diagnosis if the warning stays on or returns after the cap is secured. |
| Fuel odor or visible leakage is present. | The cap, seal, filler neck, or another part of the fuel system may be damaged. | Stop fueling and keep away from flames, sparks, and smoking. Do not drive if fuel is visibly leaking; arrange professional inspection. | Replace a damaged cap, but have persistent odor or leakage assessed promptly because the problem may be elsewhere in the fuel system. |
A gas cap that stops clicking may have a worn ratchet, damaged seal, or problem with the filler neck. A single missed click does not prove there is a leak. Check that the cap sits straight and that its rubber seal is not cracked, flattened, or dirty. That detail helps. If the cap feels loose again after careful refitting, or you smell fuel near the parked car, arrange an inspection rather than forcing it tighter. Do not guess.
Seek professional help if a fuel smell persists, you see wet spots beneath the vehicle, or the check-engine light stays on after the cap is secured. A loose seal can let fuel vapors escape and may trigger an evaporative-system fault, but other faults can produce similar symptoms. Hard starting after refueling, repeated warning lights, or a failed emissions inspection also deserves attention. A technician can inspect the cap and filler neck, then test the evaporative system for leaks. If the odor is strong or fuel is visibly leaking, stop driving, move away from the vehicle, and contact roadside assistance or emergency services. Small clues matter, though they do not identify the cause on their own.